XM Cloud offers analytics and personalization capabilities, albeit in a limited feature version. In this article, we will show you the steps to enable this.

Prerequisite
When you subscribe to Sitecore XM Cloud, you actually get a simplified version of Sitecore CDP + Personalize. To activate this feature, the following conditions must be met
- Sitecore Cloud SDK is included as a package
- Get the required values from the XM Cloud environment
- Environment variables are enabled as Web site environment variables.
Note that if you are using an older version of the project (JSS 21.5 or earlier), you may be using the Sitecore Engage SDK. The differences between the packages are described in the following page.
Create and setting site identifiers
A mechanism called site identifier is provided to determine which site the data will be retrieved for. This value is retrieved and set individually for each XM Cloud site.
First, log in to XM Cloud and click on the menu at the bottom right of the list of sites, which will take you to the following screen.
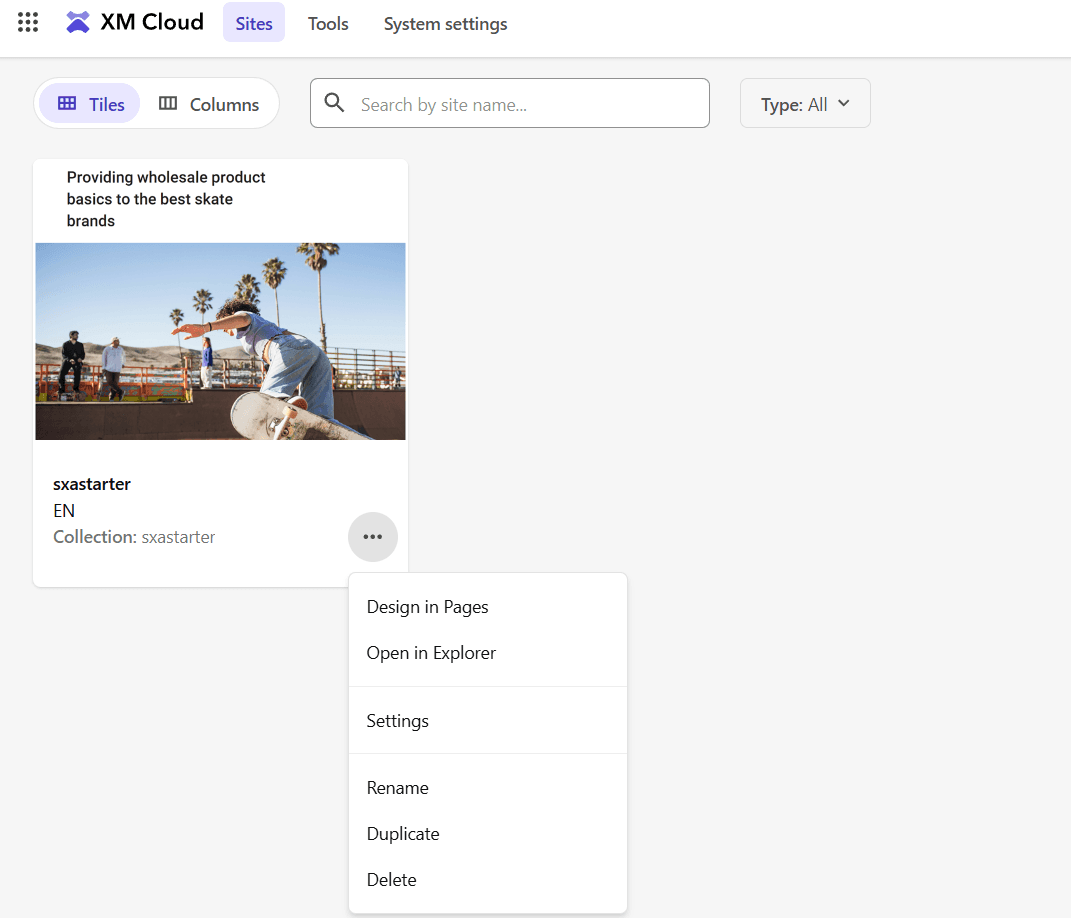
Click on Setting, then click on the Site Identifiers item to display the Unconfigured screen as shown below.
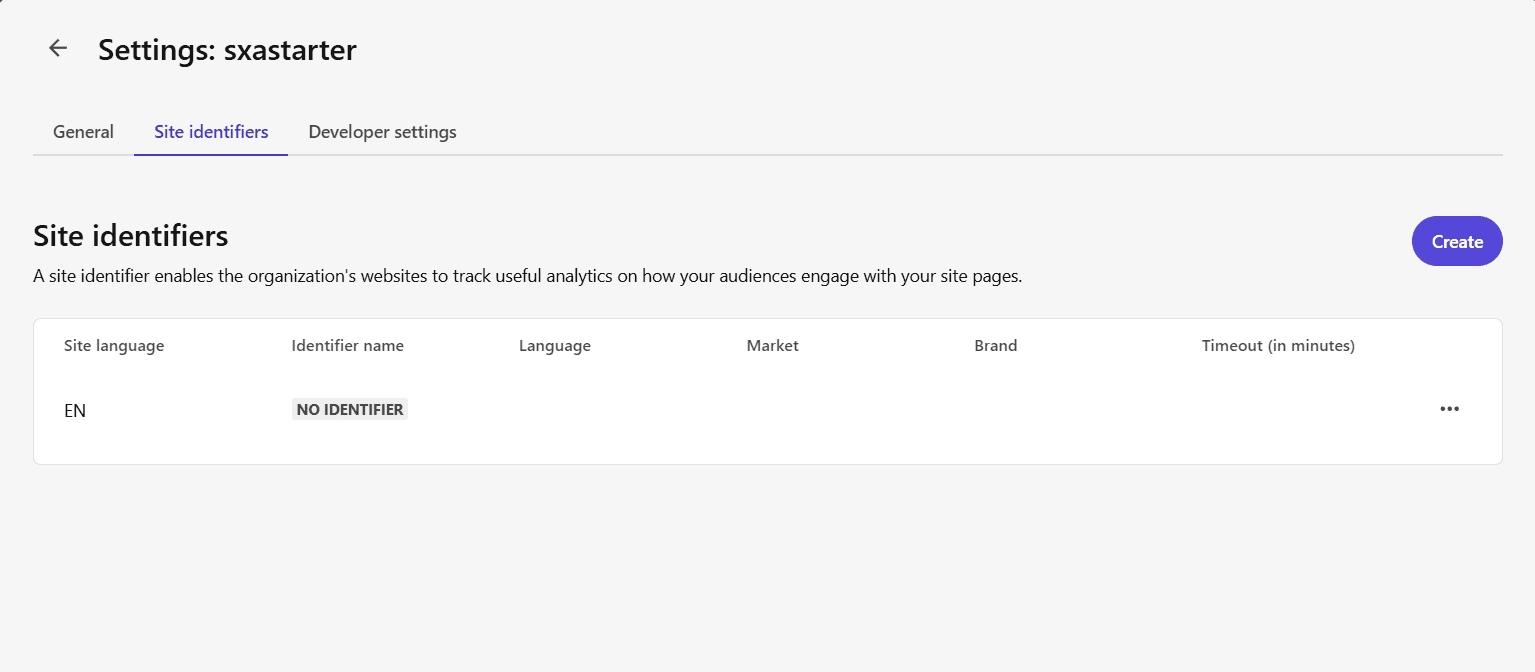
When creating for the first time, there are no identifiers prepared for assignment. Click on the Create button in the upper right corner to move to the Create screen.
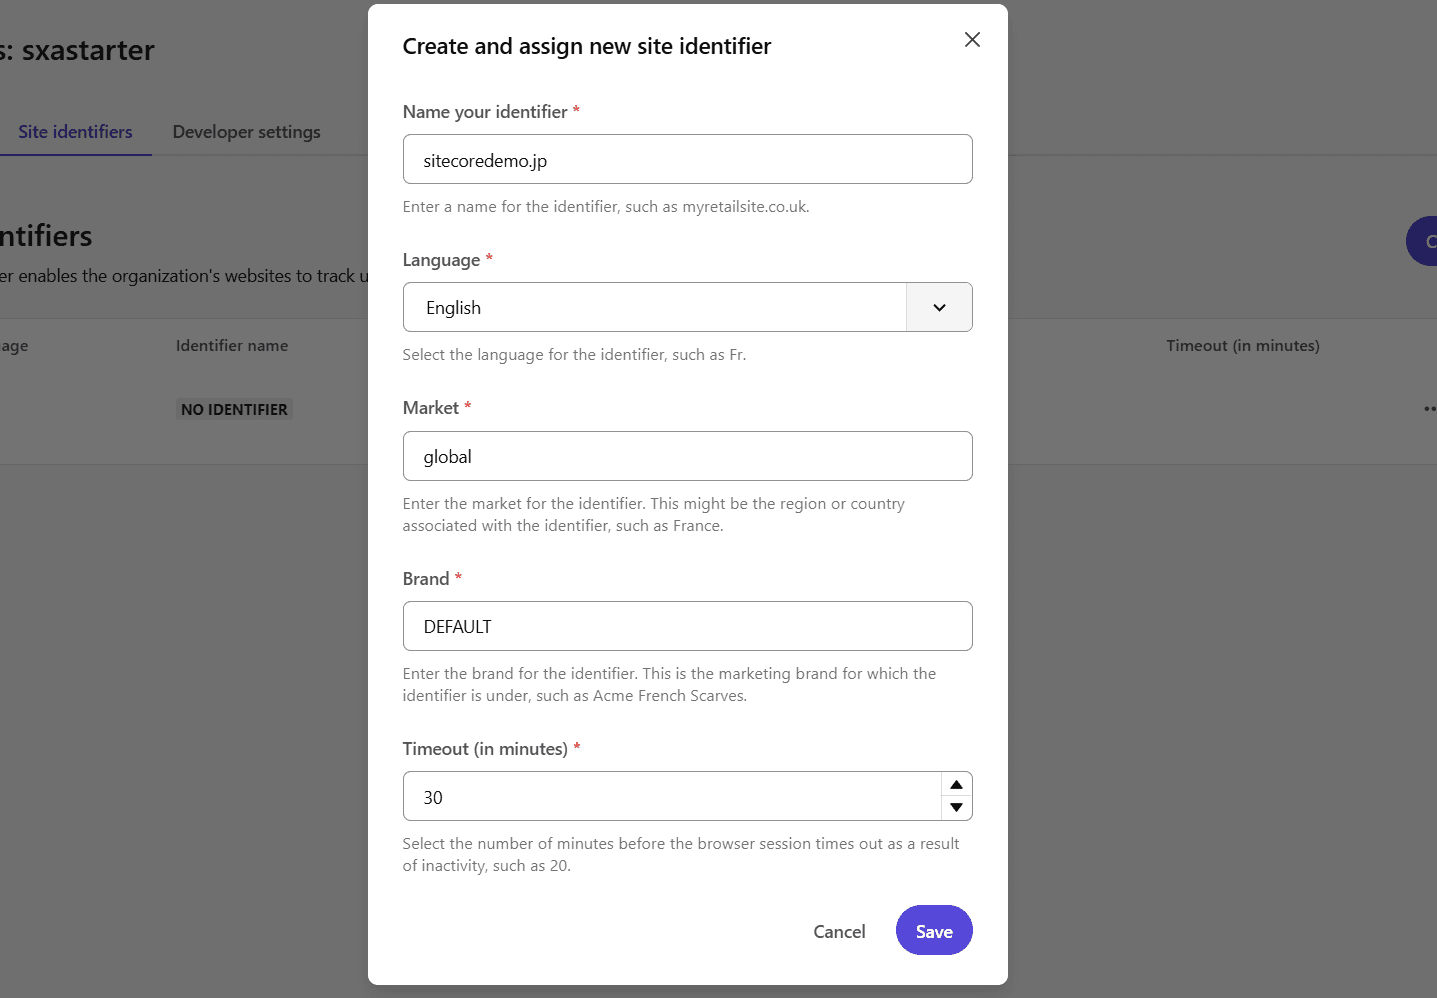
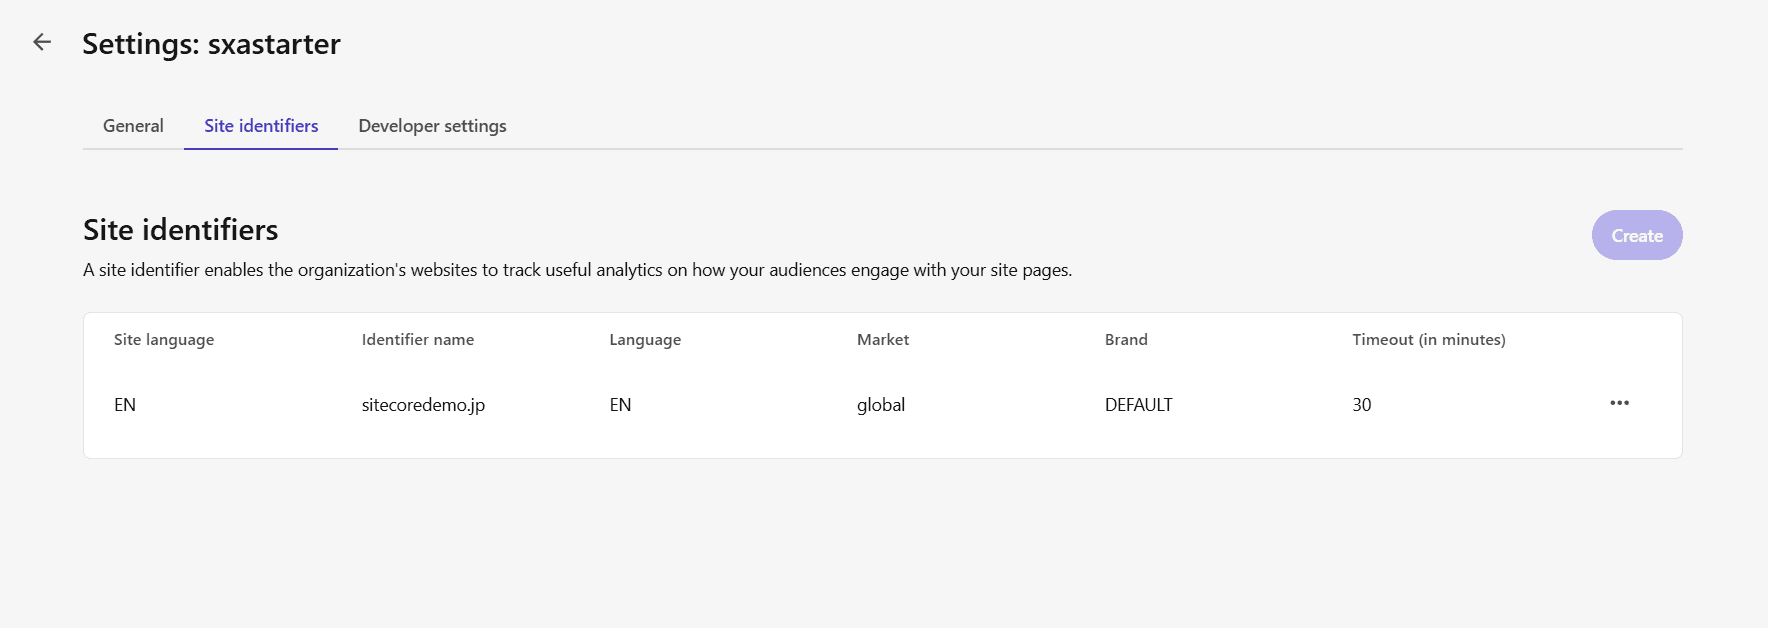
After you have created and completed the assignment, you will see the following screen.
Changing Web Site Environment Variables
After the site identifier has been created and configured, it is necessary to reflect the created site identifier on the website. The values to be set can be found in the Developer settings tab.
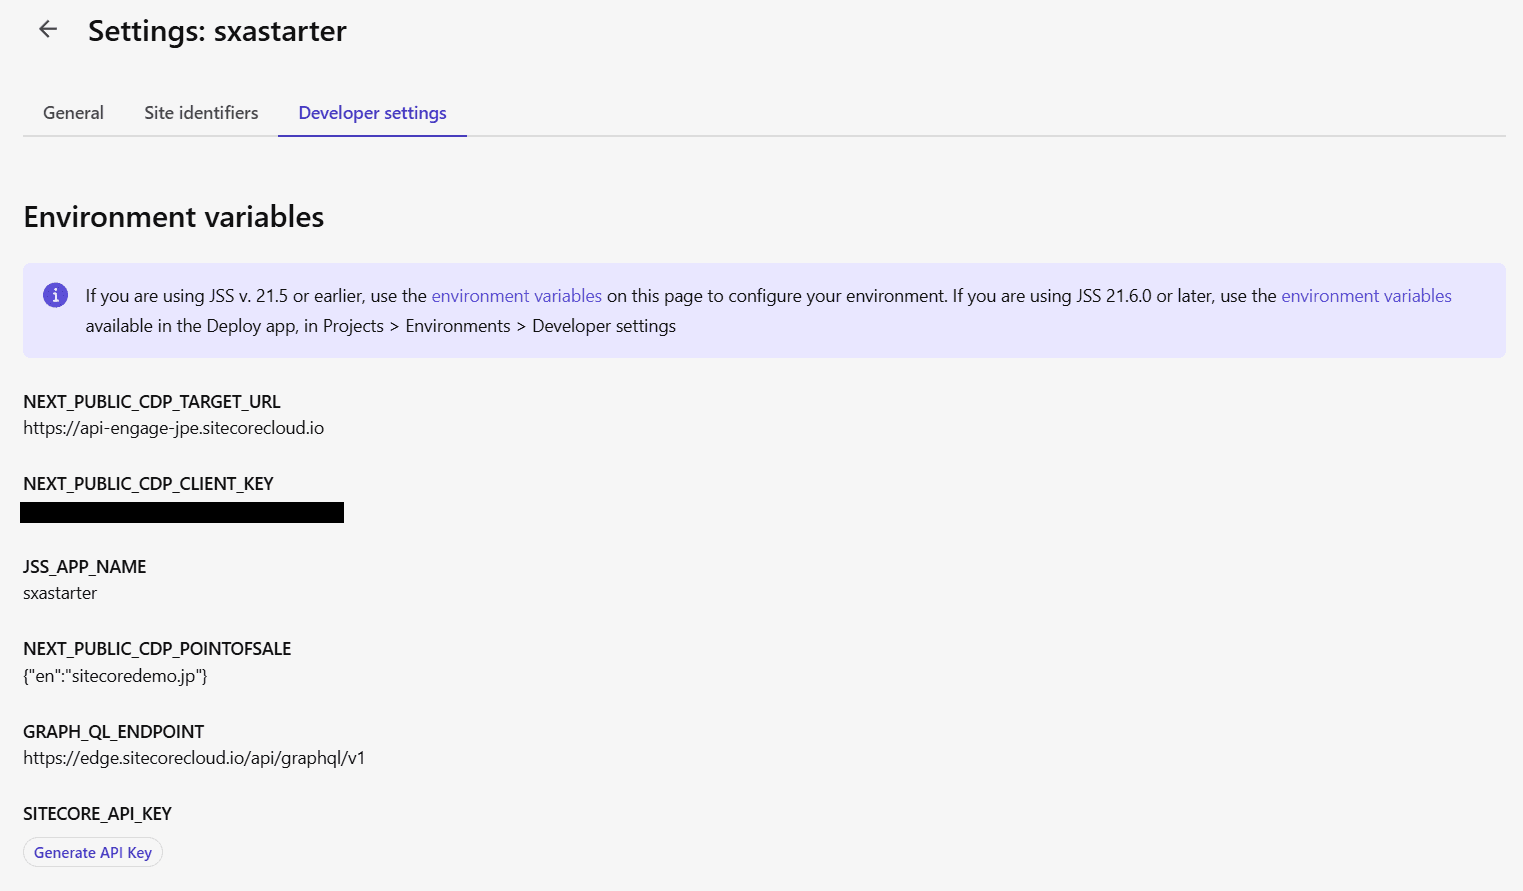
The three values to be reflected on the site are as follows
- NEXT_PUBLIC_CDP_TARGET_URL
- NEXT_PUBLIC_CDP_CLIENT_KEY
- NEXT_PUBLIC_CDP_POINTOFSALE
These three values are set on the Vercel side this time.
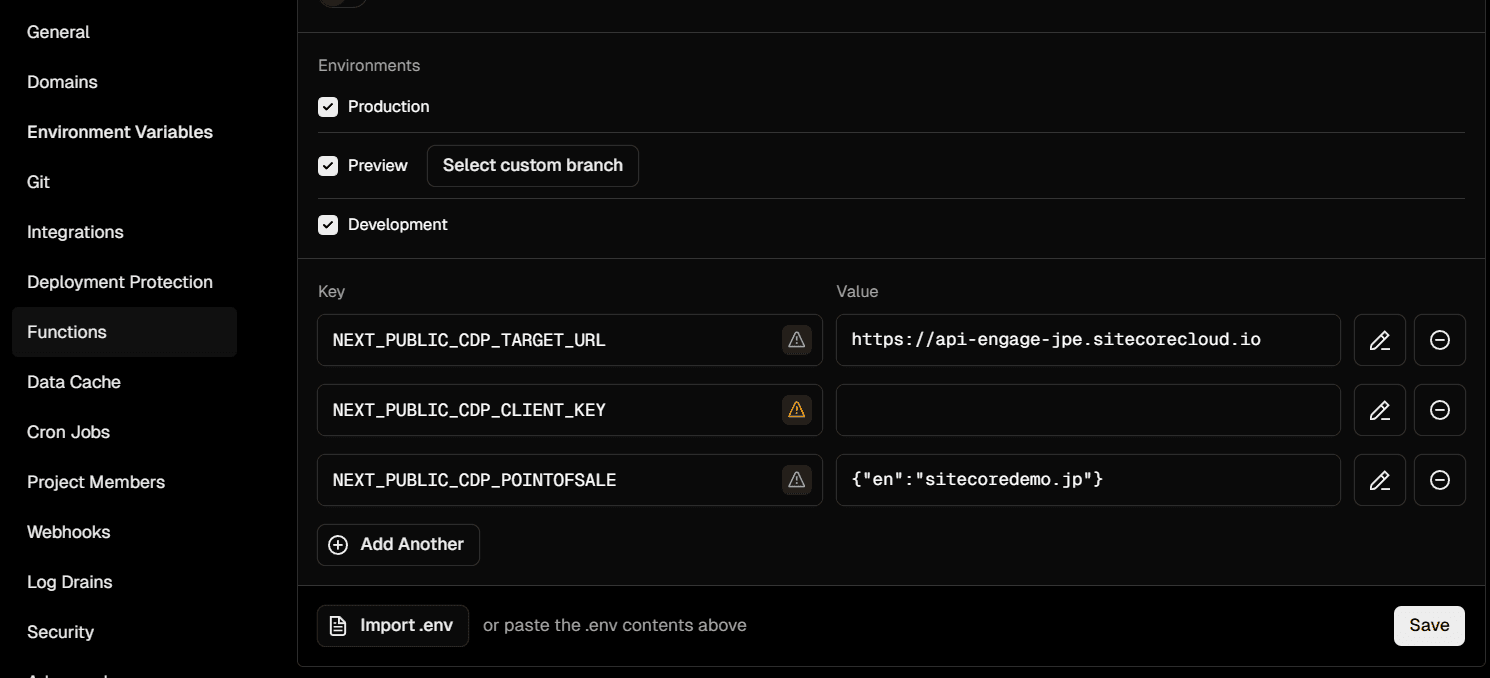
This completes the configuration. To reflect this in the environment, run rebuild on the Vercel web site to activate the settings for the site.
Operation check
After checking the actual published status and making sure that the data is entered into Analytics, click on the Analytics button from the Administration page a short time later.
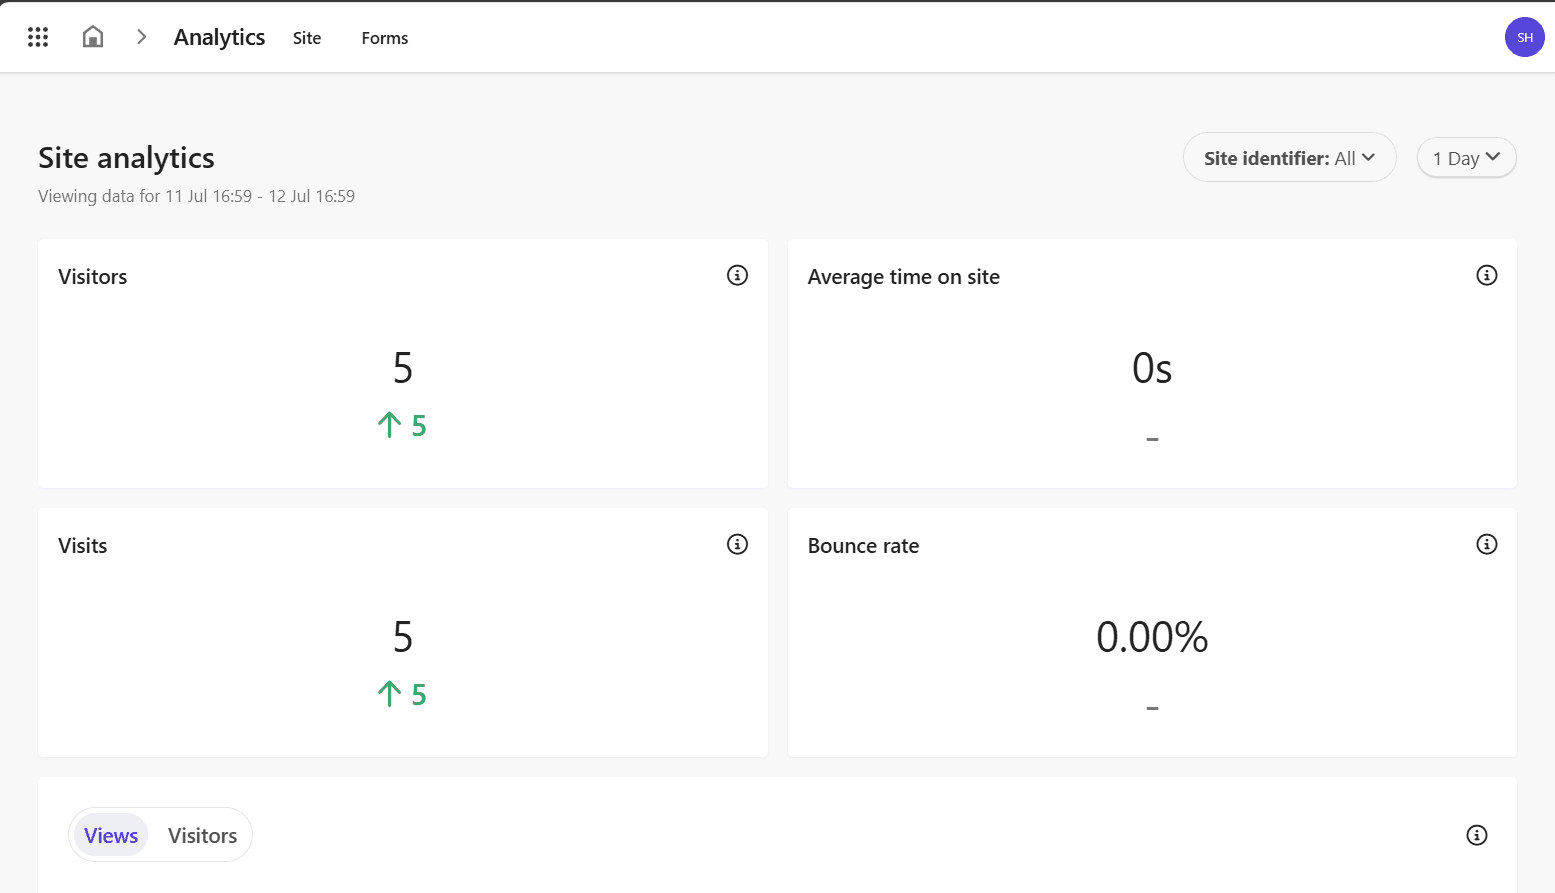
We were able to confirm that the analytics are enabled.
Summary
As for the analytics provided by XM Cloud, there is a limit of 30 days. This limitation can be found on the Analyze page. In this article, we have introduced the Analytics configuration among the features provided by XM Cloud.