As we have shown in our blog, attributes can be set with JavaScript during crawling. In this article, we will show you how to actually check the facets in action and increase the number of attributes.

Check facets
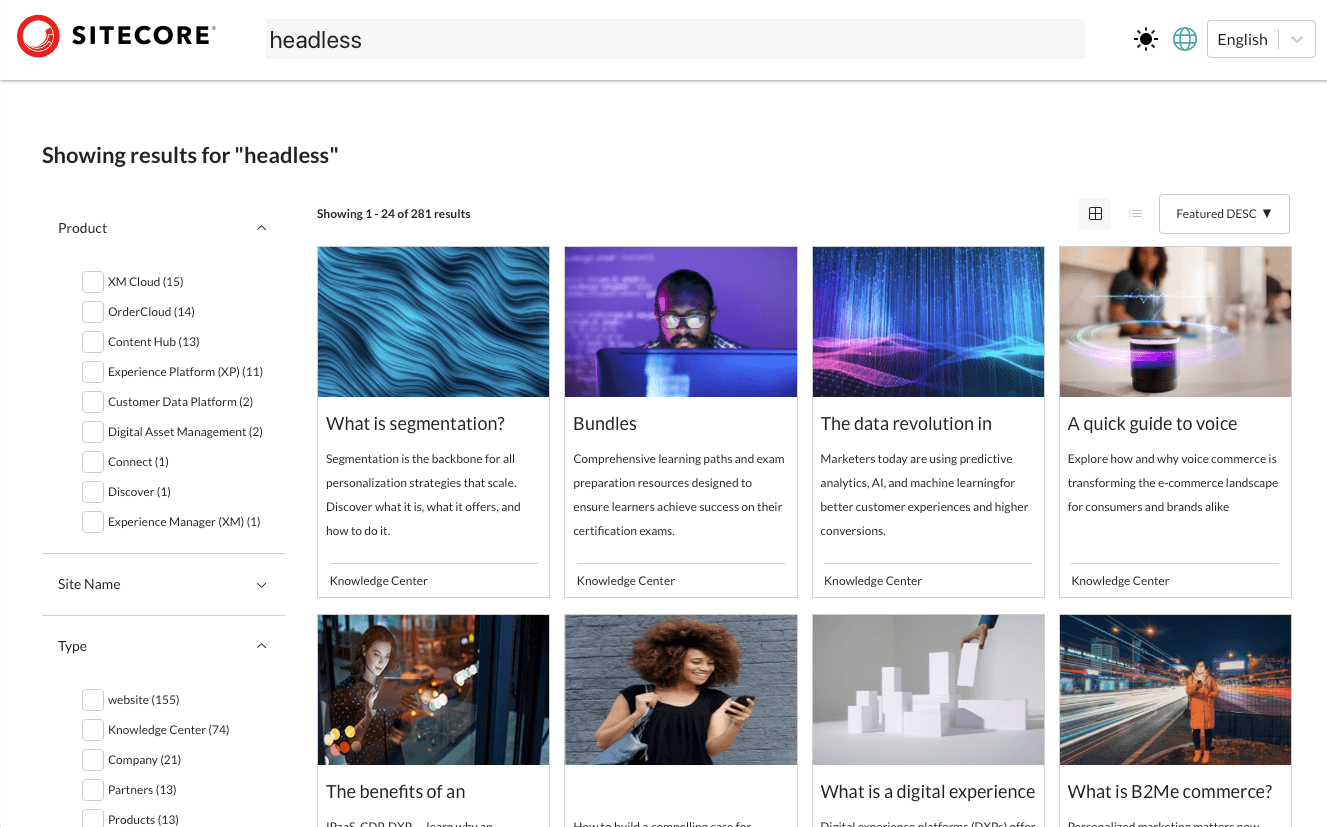
First, access the page you are creating with the Sitecore Search SDK using the keyword "Headless". Then, you will see the following screen.
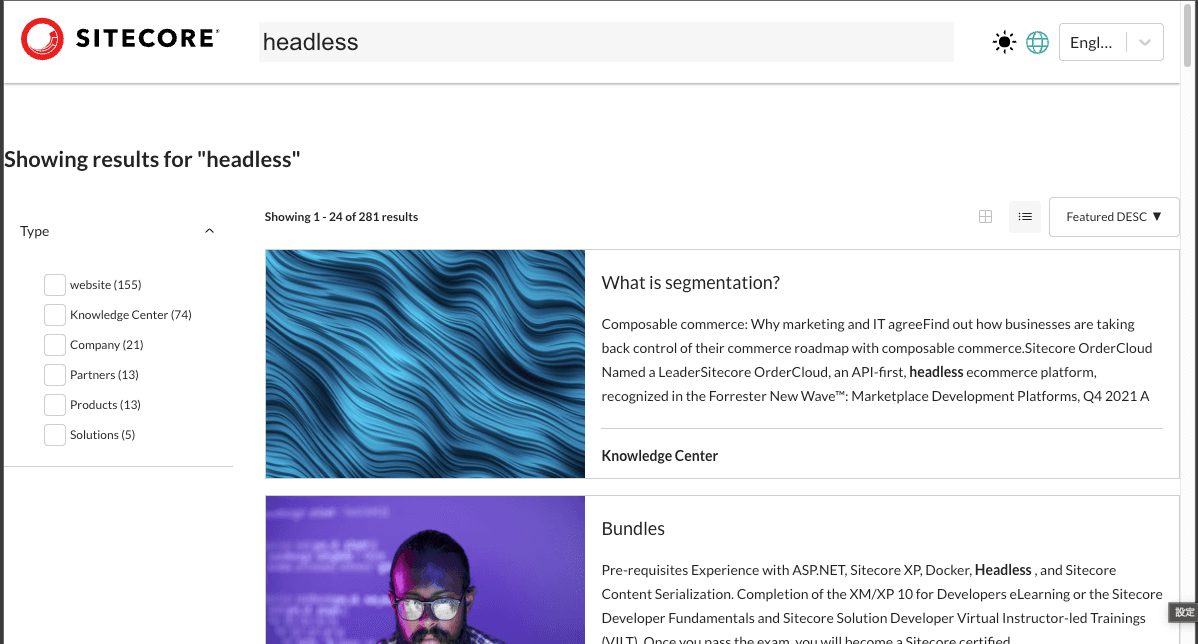
The type of content is automatically displayed on the left side of the search results in the form of a Type. When you access the corresponding content from the administration page, you will see that the items set in Content Type are used in this facet.
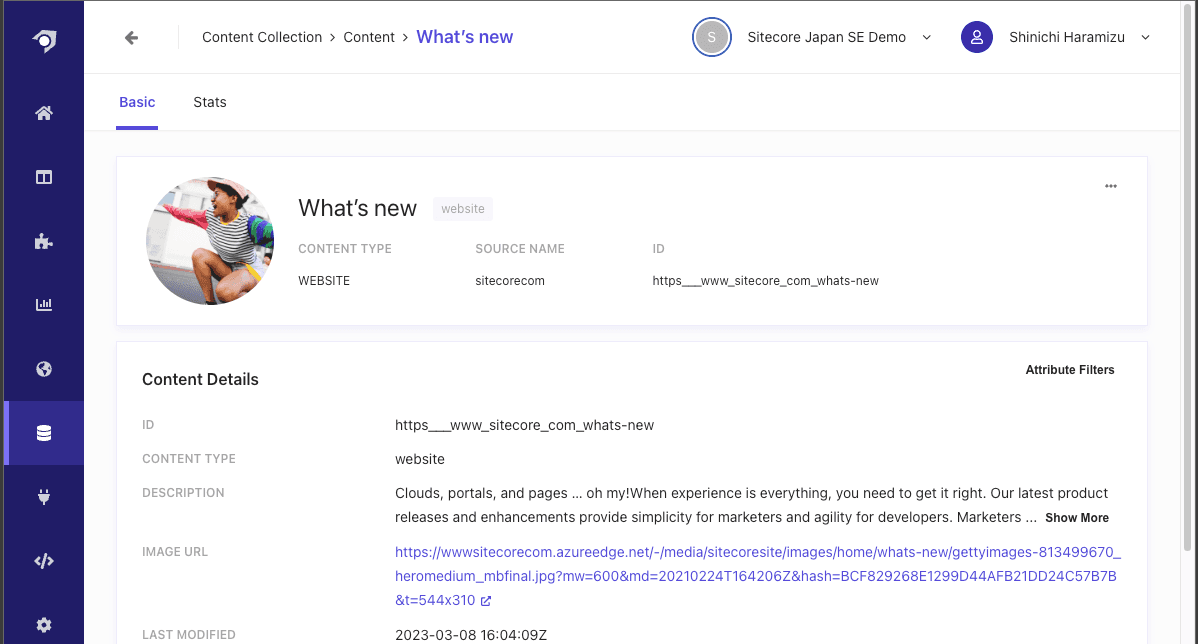
This item is handled as part of the JavaScript code set up in Document Extractor.
    // URL からコンテンツタイプを指定する
    let subtype;

    if (url.includes('/products/')) {
      subtype = 'Products';
    } else if (url.includes('/solutions/')) {
      subtype = 'Solutions';
    } else if (url.includes('/knowledge-center/')) {
      subtype = 'Knowledge Center';
    } else if (url.includes('/partners/')) {
      subtype = 'Partners';
    } else if (url.includes('/company/')) {
      subtype = 'Company';
    } else {
      subtype = 'website';
    }
The facets are configured in Facets under Feature Configuration in Domain Settings.
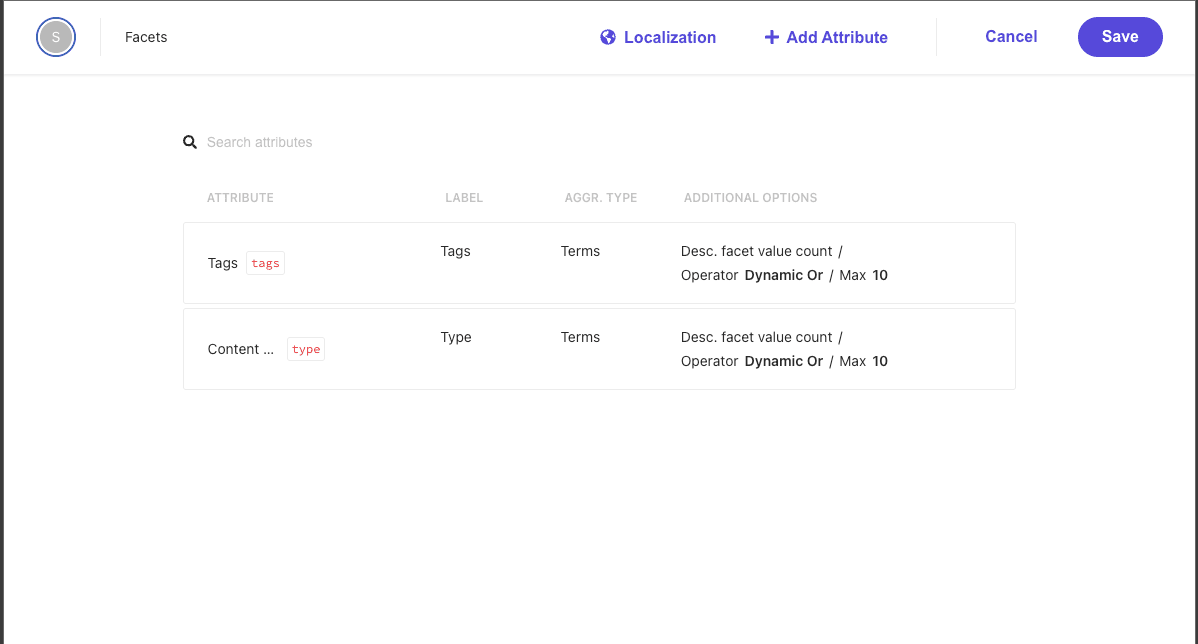
Now let's increase the number of Facets used in the search results.
Adding Attributes
This time, we will add two items. The first is to create a Product that will add attributes about the product.
Column | Value |
|---|---|
Display Name | Product |
Attribute Name | product |
Placement | Standard |
Data Type | String |
Properties | Return in api response - Check |
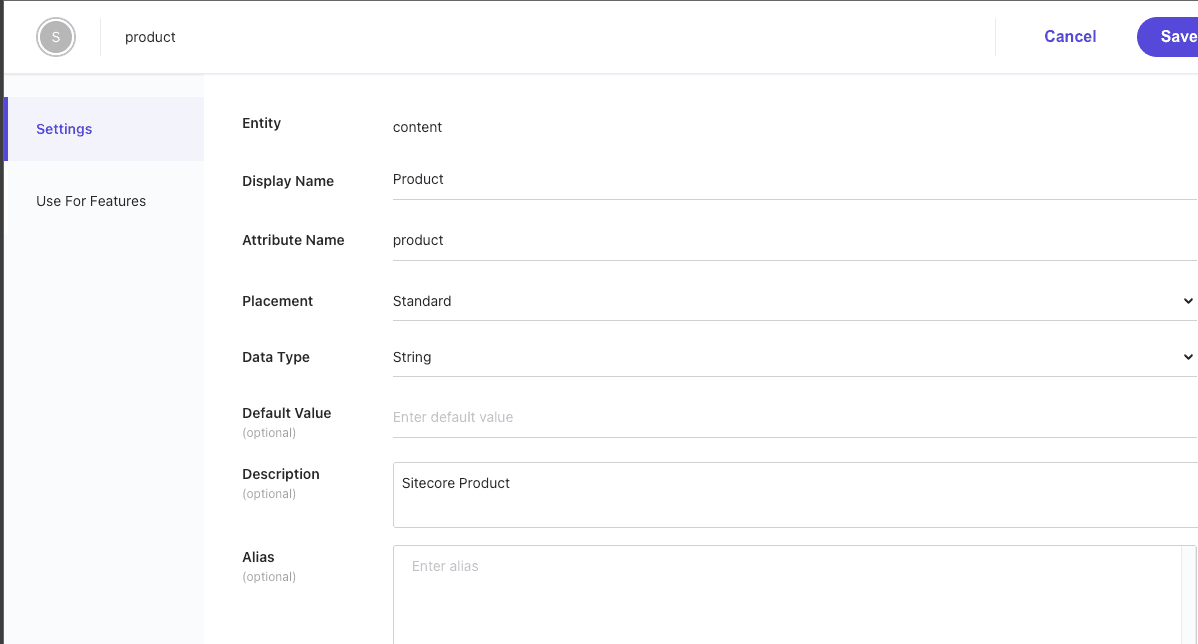
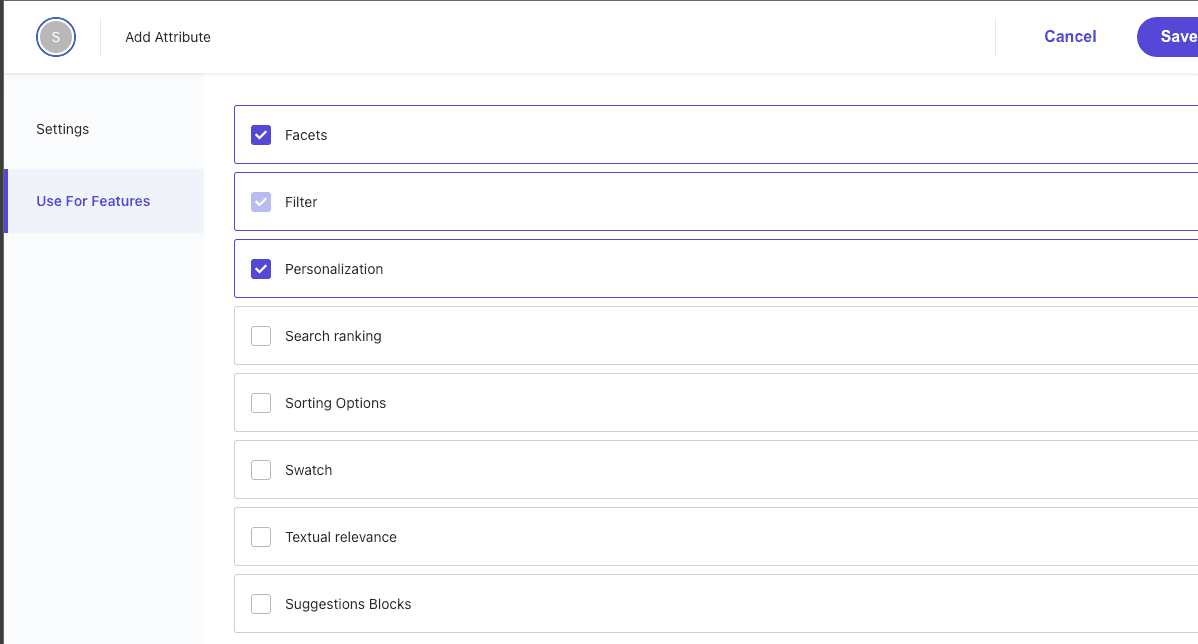
On the Use For Feature tab, check Facets and Personalize.
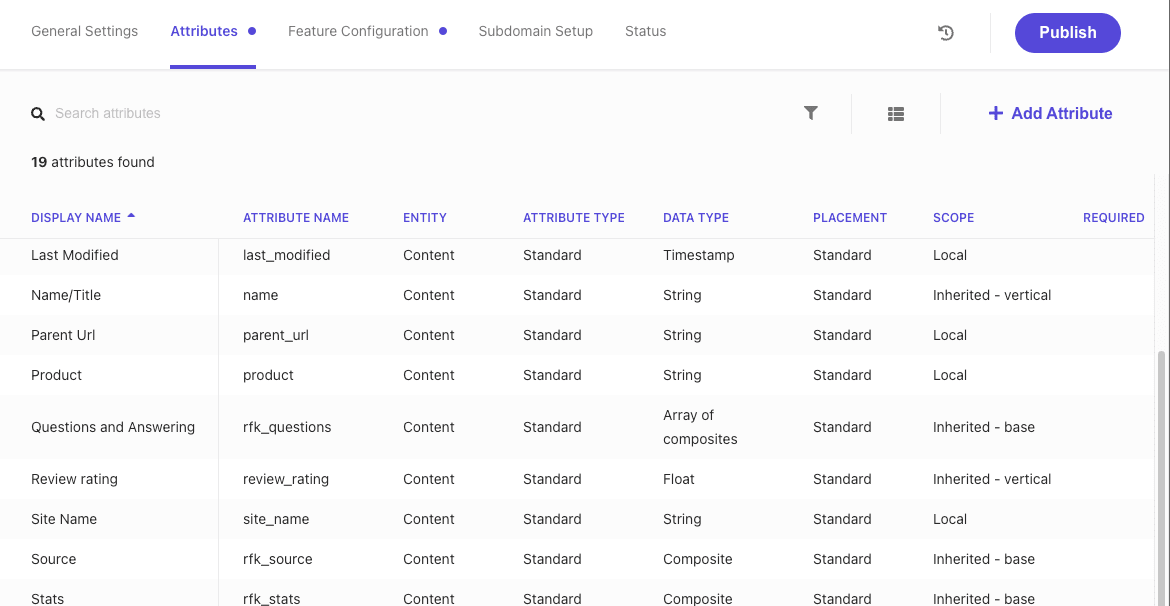
The Attributes screen with the two additional items is as follows The Attributes screen with the two new items is as follows.
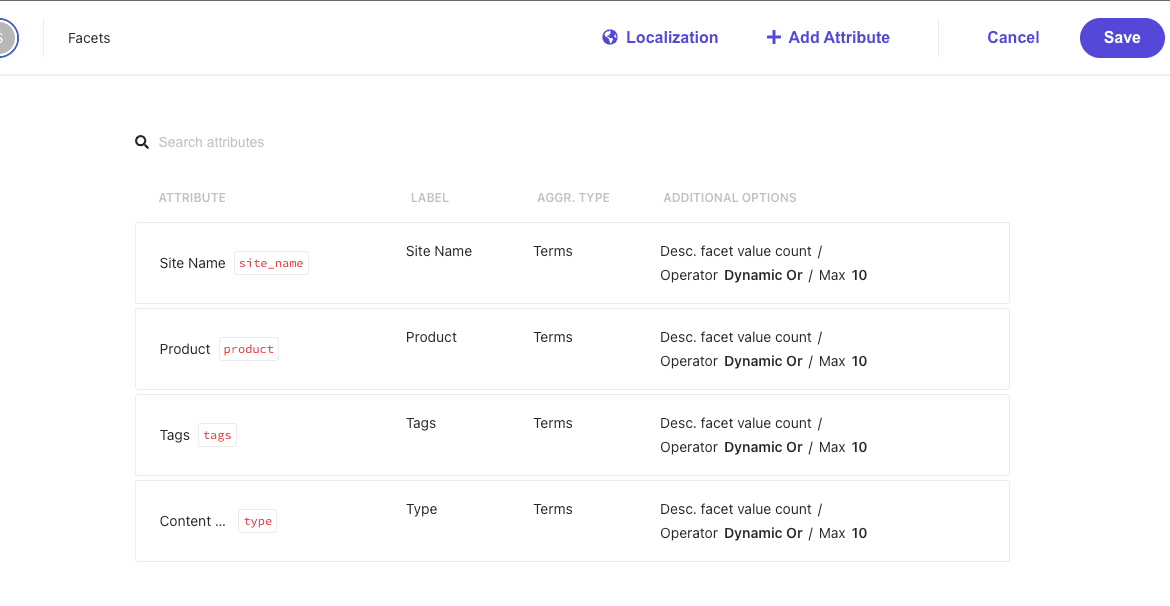
If you check the Facets screen in Domain Settings, you will see that Site Name and Product have been added.
This completes the addition of Attributes; click Publish to update Domain Settings and activate the attributes.
Crawler Changes
In the already configured source settings for Sitecore.com, change the Document Extractors to use the new attributes. In this case, change the JavaScript Return as follows
    return [{
        'id': id,
        'title': $('h1').text(),
        'subtitle': $('meta[name="description"]').attr('content') || $('section[data-component-name="Hero Banner"] div[class*="side-content"]>div>p, header div.lead p').text(),
        'description': $('meta[name="description"]').attr('content') || $('meta[property="og:description"]').attr('content') || $('p').text(),
        'image_url': $('section[class*="component hero"] picture>img').attr('src') || $('meta[name="image"]').attr('content'),
        'last_modified': $('meta[name="last_modified"]').attr('content'),
        'name': $('meta[name="searchtitle"]').attr('content') || $('title').text(),
        'type': subtype,
        'product': $('meta[name="product"]').attr('content'),
        'site_name': 'Sitecore.com',
        'url': $('meta[property="og:url"]').attr('content')
    }];
We have also made some changes to the title loading and images. The attributes we have added this time are product and site_name, but since the crawler is working with sitecore.com, we have set fixed values here.
When using Xpath in the above data setup, the following description is used to set fixed values.
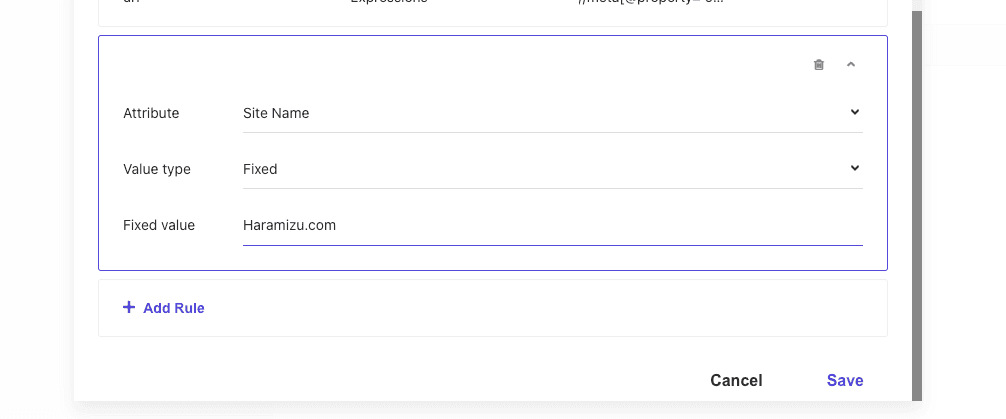
Please add an attribute and do a new crawl.
Content Verification
After the actual crawl is complete, you will be taken to the Search page. If you do a search using the keyword, you will see the facet added as follows.
Summary
In this case, we used attributes to set facets; if there is an item for which data can be set using Xpath, it can easily be set. It is also possible to use JavaScript to specify the configuration items and add values to the attributes. By designing well, such as which data can be used as facets, you can create pages that are easy to search.