In a CDP, data linked to profiles can include sessions (web activity and conversions) and order information. Order data, often obtained from different systems, can be added via API. This guide introduces the steps for this process.

Order Data Structure
The actual structure of the data is the unit of measure of the order (there is something like an order number), then the items of the order contained in that order, and then which user the order is tied to.
The following is an image of the actual JSON data and API.
- Order (order number is unique)
- Product(s) purchased
- Purchased user information
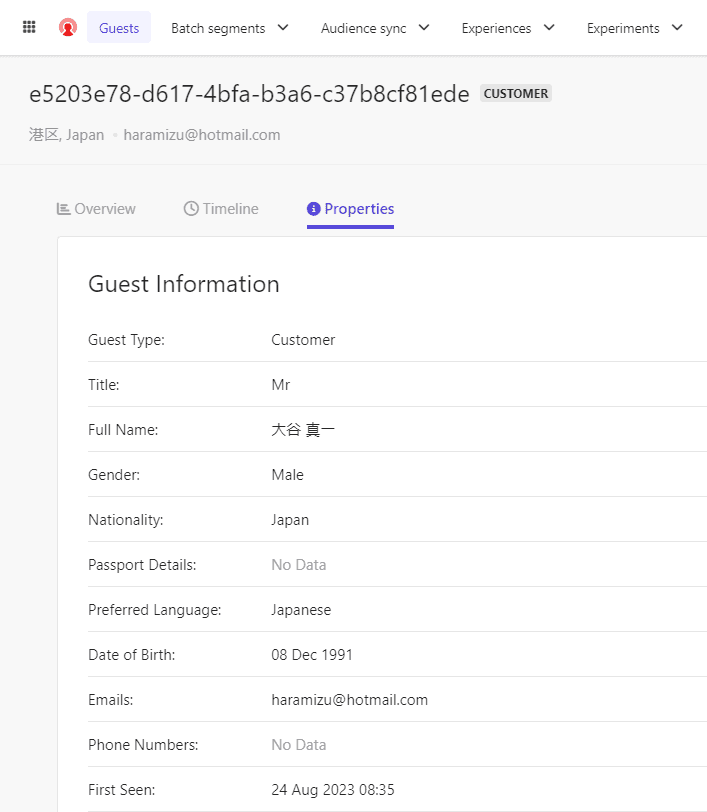
In order to create a new user and link the user to the system, the following Json file is used to create the user in advance.
 {
    "guestType": "customer",
    "title": "Mr",
    "firstName": "大谷",
    "lastName": "真一",
    "gender": "male",
    "dateOfBirth": "1991-12-08T00:00:00.000Z",
    "emails": [
        "haramizu@hotmail.com"
    ],
    "language": "JA",
    "nationality": "Japan",
    "street": [
        "南青山"
    ],
    "city": "港区",
    "country": "JP",
    "postCode": "1070062",
    "state": "東京都"
}
Check the information on your order
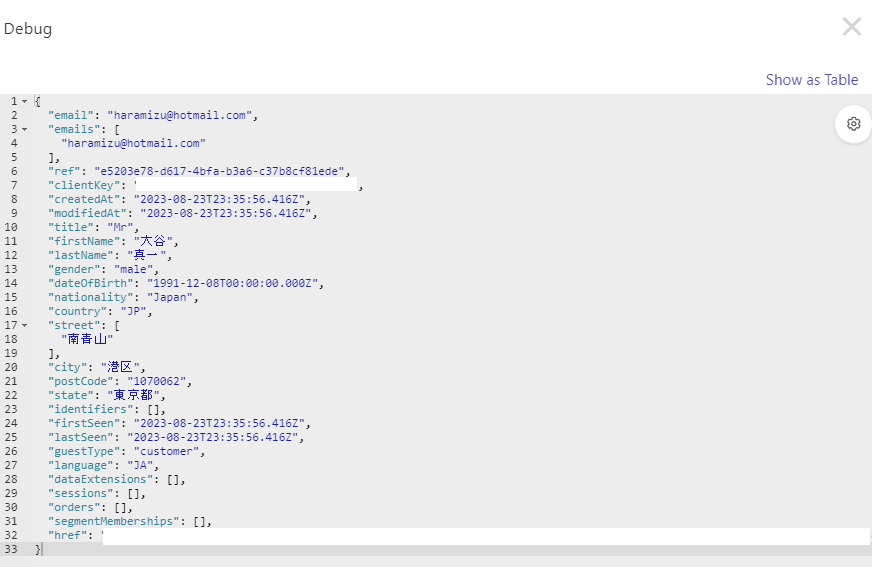
Since the user has just been created, there is no information on the order, but in order to verify the data, the following API is used to retrieve the information.
GET /v2/orders?guestRef=<guestRef>The following data was returned: items item is not included.
{
    "href": "https://api-engage-ap.sitecorecloud.io/v2/orders?offset=0&limit=10&guestRef=guid",
    "offset": 0,
    "limit": 10,
    "items": []
}Checking the data in debug mode shows that the Orders are empty.
Add Order
Instructions for adding an order can be found on the following page.
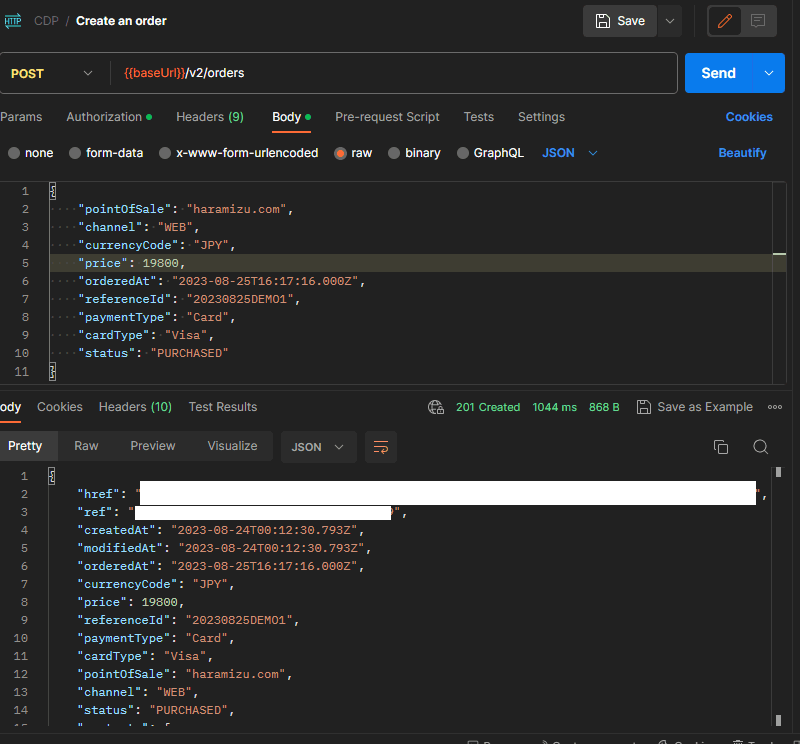
Postman requires the following settings
POST /v2/ordersThe required fields are as follows: referenceId is the order number, so this value must be unique. The value is for reference information only.
Attribute | Value |
|---|---|
pointOfSale | haramizu.com |
currencyCode | JPY |
price | 19800 |
orderdAt | 2023-08-25T16:17:16.000Z |
referenceId | 20230825DEMO1 |
In this case, we used the following JSON data in the form of some additional information.
{
    "pointOfSale": "haramizu.com",
    "channel": "WEB",
    "currencyCode": "JPY",
    "price": 19800,
    "orderedAt": "2023-08-25T16:17:16.000Z",
    "referenceId": "20230825DEMO1",
    "paymentType": "Card",
    "cardType": "Visa",
    "status": "PURCHASED"
}
The results are displayed and the order information is ready.
Add product information
The product information has not yet been added to the created order. Instructions on how to actually add the data can be found on the following page.
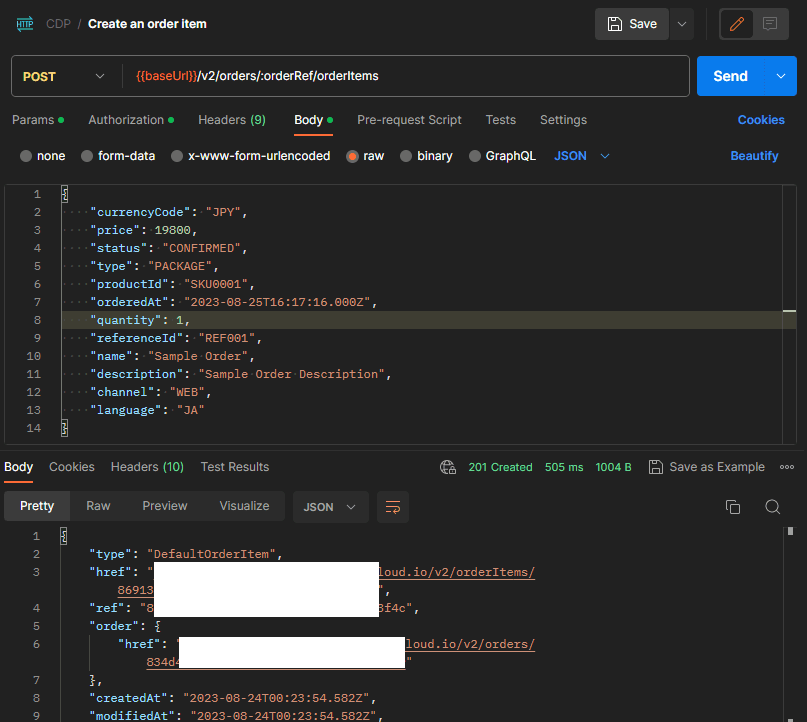
When using Postman, the following information is used to create items
POST /v2/orders/<orderRef>/orderItemsSet the orderRef to the value of the order you just created. The required fields to be used in the request are as follows
Attribute | Value |
|---|---|
currencyCode | JPY |
price | 19800 |
status | CONFIRMED |
type | PACKAGE |
productId | SKU0001 |
referenceId | REF001 |
The following JSON data will be used in this case.
{
    "currencyCode": "JPY",
    "price": 19800,
    "status": "CONFIRMED",
    "type": "PACKAGE",
    "productId": "SKU0001",
    "orderedAt": "2023-08-25T16:17:16.000Z",
    "quantity": 1,
    "referenceId": "REF001",
    "name": "Sample Order",
    "description": "Sample Order Description",
    "channel": "WEB",
    "language": "JA"
}
The result of the execution is as follows: an item is created.
The order item when created is blank, as shown below.
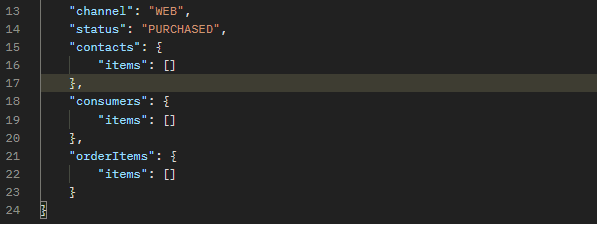
This has been updated as the item was created.
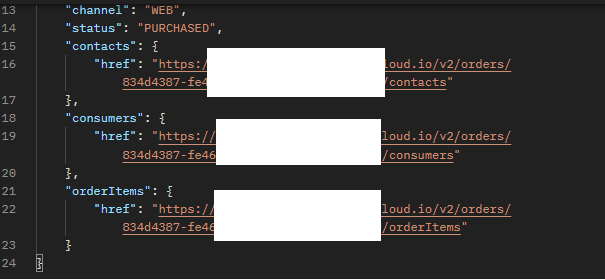
Creating User Information
There are two CDP records: Order contact and Order consumer. This can be used in cases where the person who placed the order and the recipient are different. In this case, we will link the order to a contact that has already been created.
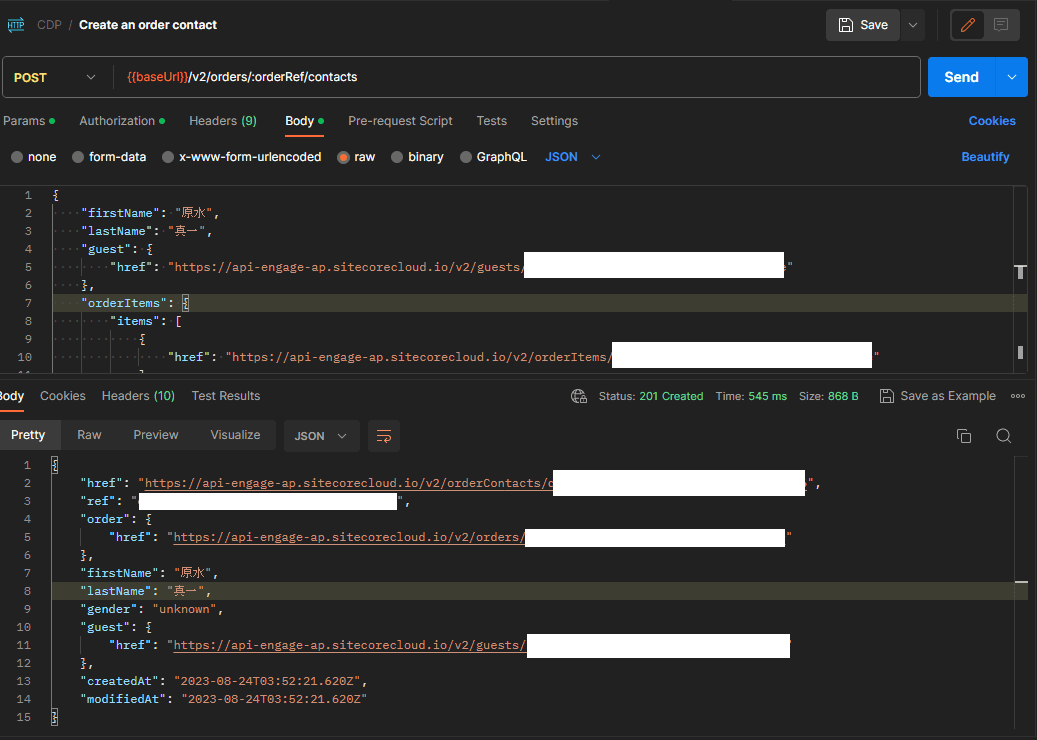
First, create a Corder Contact. Details are described in the following page.
The execution is as follows
POST /v2/orders/<orderRef>/contactsThe items required in JSON are as follows
Attribute | Value |
|---|---|
firstName | First Name |
lastName | Last Name |
To tie in already existing profiles, run the following in Json
{
    "firstName": "原水",
    "lastName": "真一",
    "guest": {
        "href": "https://api-engage-ap.sitecorecloud.io/v2/guests/guestRef"
    },
    "orderItems": {
        "items": [
            {
                "href": "https://api-engage-ap.sitecorecloud.io/v2/orderItems/orderItemRef"
            }
        ]
    }
}
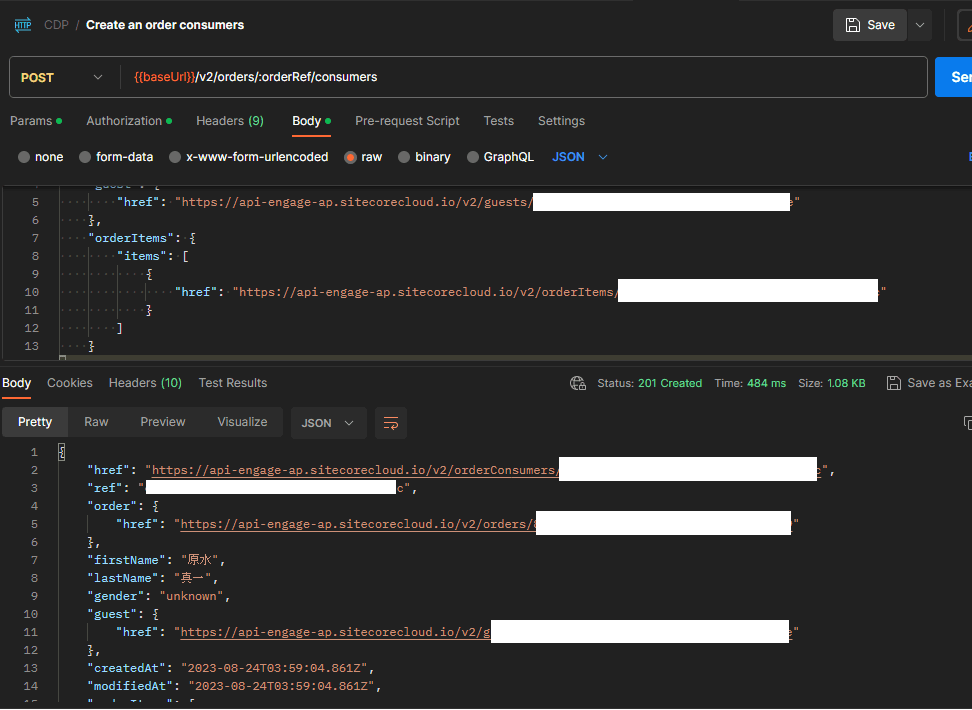
Then add Order consumer. The procedure is as follows
The page shows almost the same behavior as the Customer page, only the API URL is different.
POST /v2/orders/<orderRef>/consumersThe following is the result of a run using the exact same JSON data.
Check the data
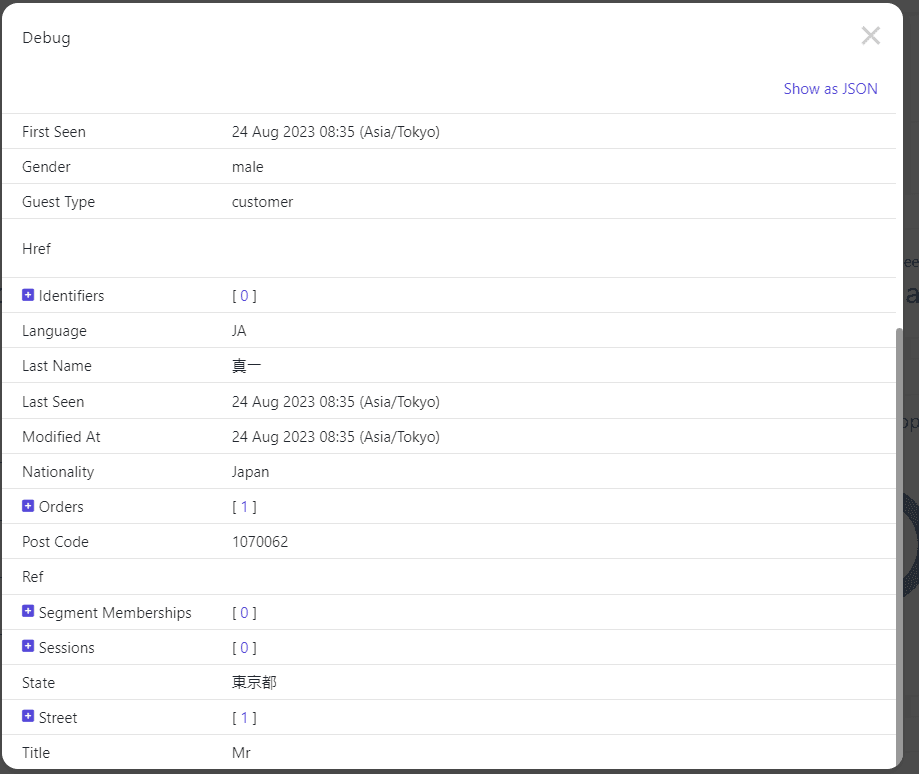
Check in Debug mode to see if the Orders are associated with the profile data. When the dialog is opened, 1 is added to Orders as shown below.
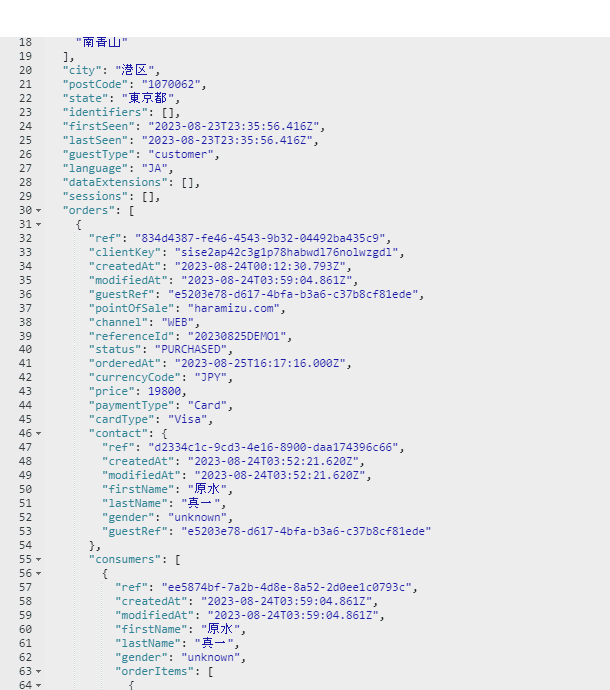
If you go to the Json data, you can see the data deployed through this API.
Summary
This time we used the REST API to create the order. In reality, the order will be sent together with involuntary data from the outside through system integration, but we thought we could check the structure of the data by introducing it manually, so we executed it as shown in this case.
For more information on the Batch API, which is more suited for batch processing, please refer to the following page.